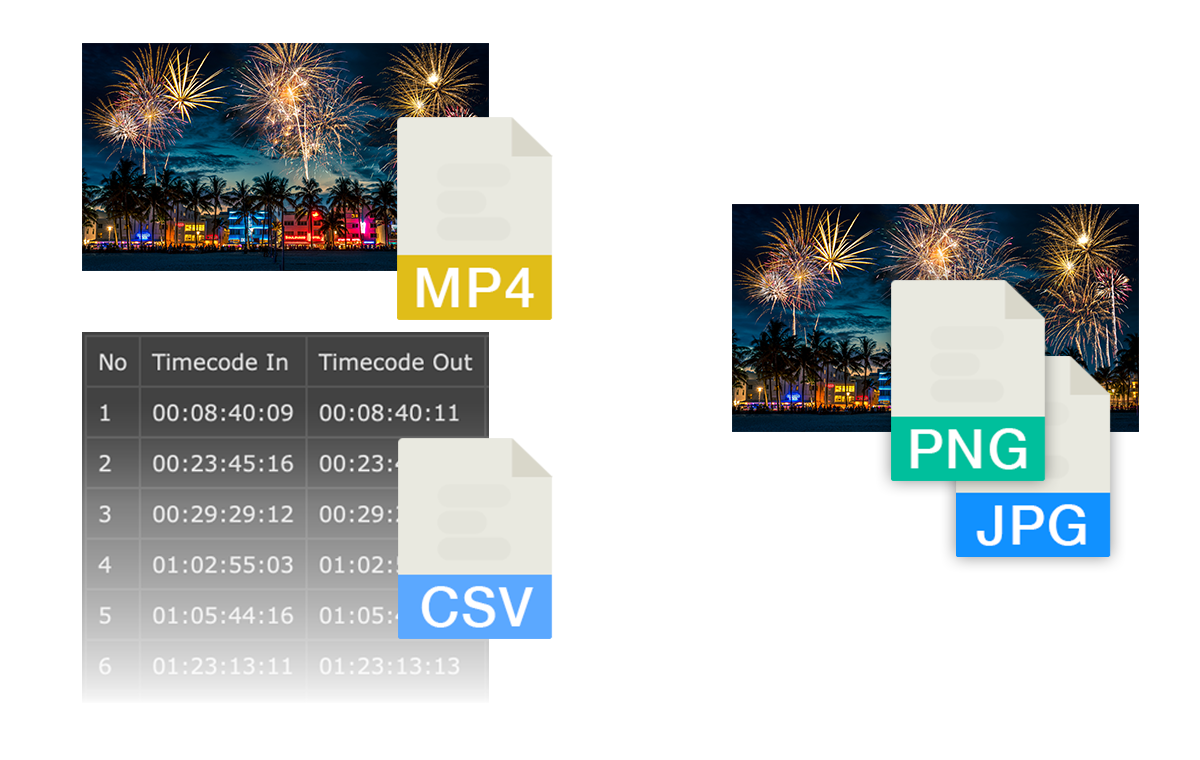
Опростяване на обмена на маркери между различни програми. Конвертирайте маркерите на времевата линия в различни формати за Premiere Pro, DaVinci Resolve, Media Composer, Pro Tools, Frame.io, Pix, CSV, Google Sheets, PDF и др. Инструментът също така ви позволява да филтрирате маркерите по цвят, да разменяте цветовете или да премествате и коригирате времевите кодове.
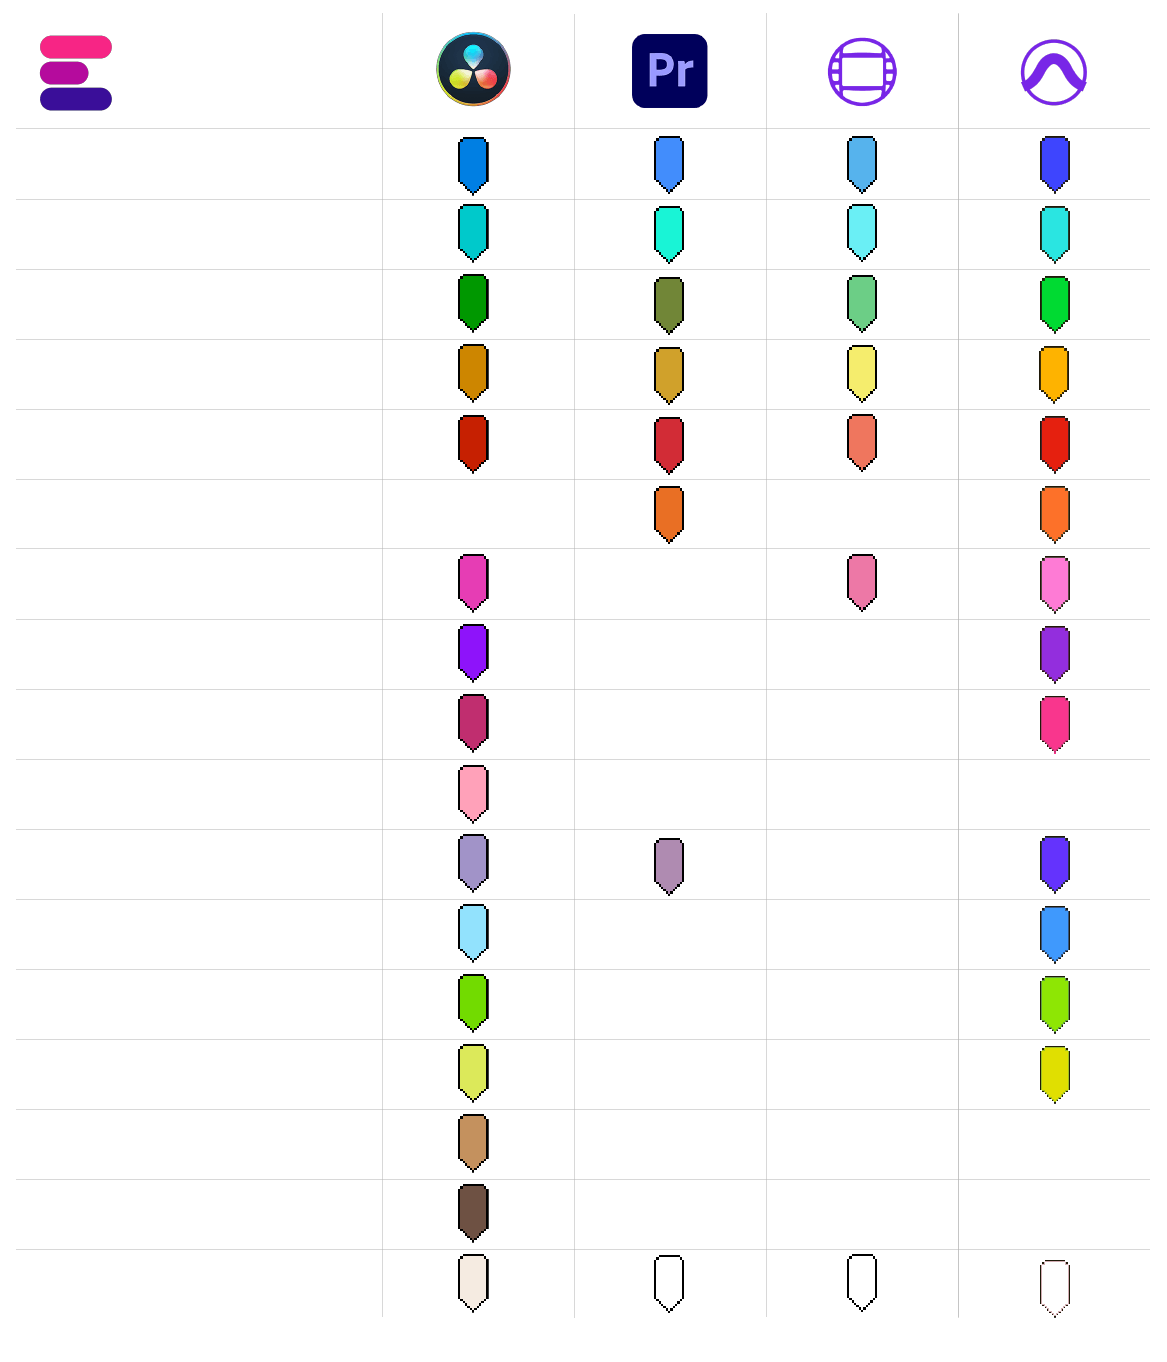
Няма единни правила за цветовете на маркерите в различните софтуери. Всяка програма използва различни цветови тонове, а отчасти и различни имена на цветовете. Конверторът на маркери на EditingTools.io се опитва да присвои цвета на маркера към най-близката цветова група.
С тази графика получавате обща представа за това кои цветове се разпознават и как се интерпретират.
Можете да определите цвят на маркера по подразбиране, който да се използва, ако не е определен цвят или той е неизвестен във файла за импортиране.
С тази функция можете да филтрирате маркери и да зададете да се конвертират само определени маркери. Ако искате да филтрирате повече от един цвят, използвайте функцията "промяна на цветовете на маркерите".
Използвайте тази функция, за да преместите всички маркери в определен диапазон. Можете да въведете положителна или отрицателна стойност.
Активирайте тази опция, за да включите маркери за клипове от Premiere Pro XML и FCP7 XML. Тази опция също така ще добави идентификатор на пистата, име на клипа, източник, входящ времеви код на източника и изходящ времеви код на източника към CSV експортите.
Презапишете имената на маркерите и задайте отделно заглавие на маркер за всеки цвят. Например можете автоматично да наименувате всички жълти маркери "VFX" и всички сини маркери "ADR", без да губите описанието.
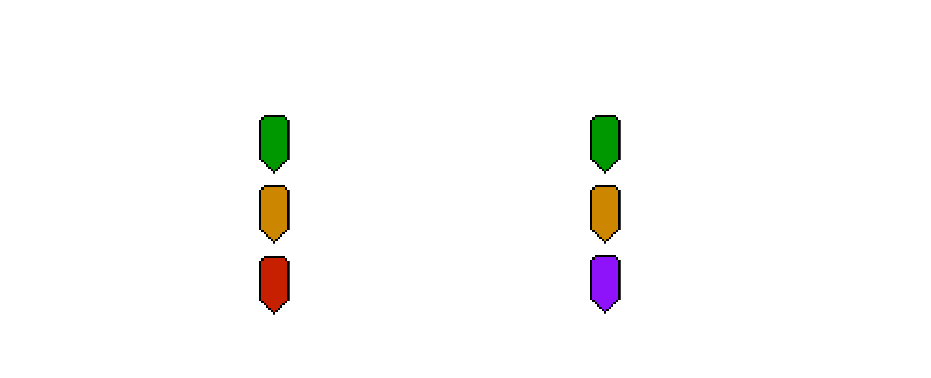
Използвайте тази функция, за да пренасочите цветовете на маркерите. Просто задайте новите цветове на маркерите чрез полетата за избор. Можете да използвате тази опция и като разширен филтър за цветове.
Можете да качвате до 20 различни файла с маркери едновременно и да ги комбинирате в един файл с маркер. Моля, обърнете внимание, че всички тези файлове трябва да са в един и същи формат.
Въведете началния времеви код на сесията или последователността за редактиране, ако използвате нещо различно от 00:00:00:00. Това е необходимо например, ако конвертирате в Avid Pro Tools и Adobe Premiere Pro или от Frame.io или Pix в друг формат.
Можете да изберете EDL файл и да превърнете всеки клип в маркер. Това е полезно за маркиране на всички VFX кадри наведнъж, например. Поставете ги на отделна писта в програмата за редактиране и експортирайте EDL само с тази видеописта. Задайте полето "Конвертиране от" на "Конвертиране на клипове от EDL в маркери".
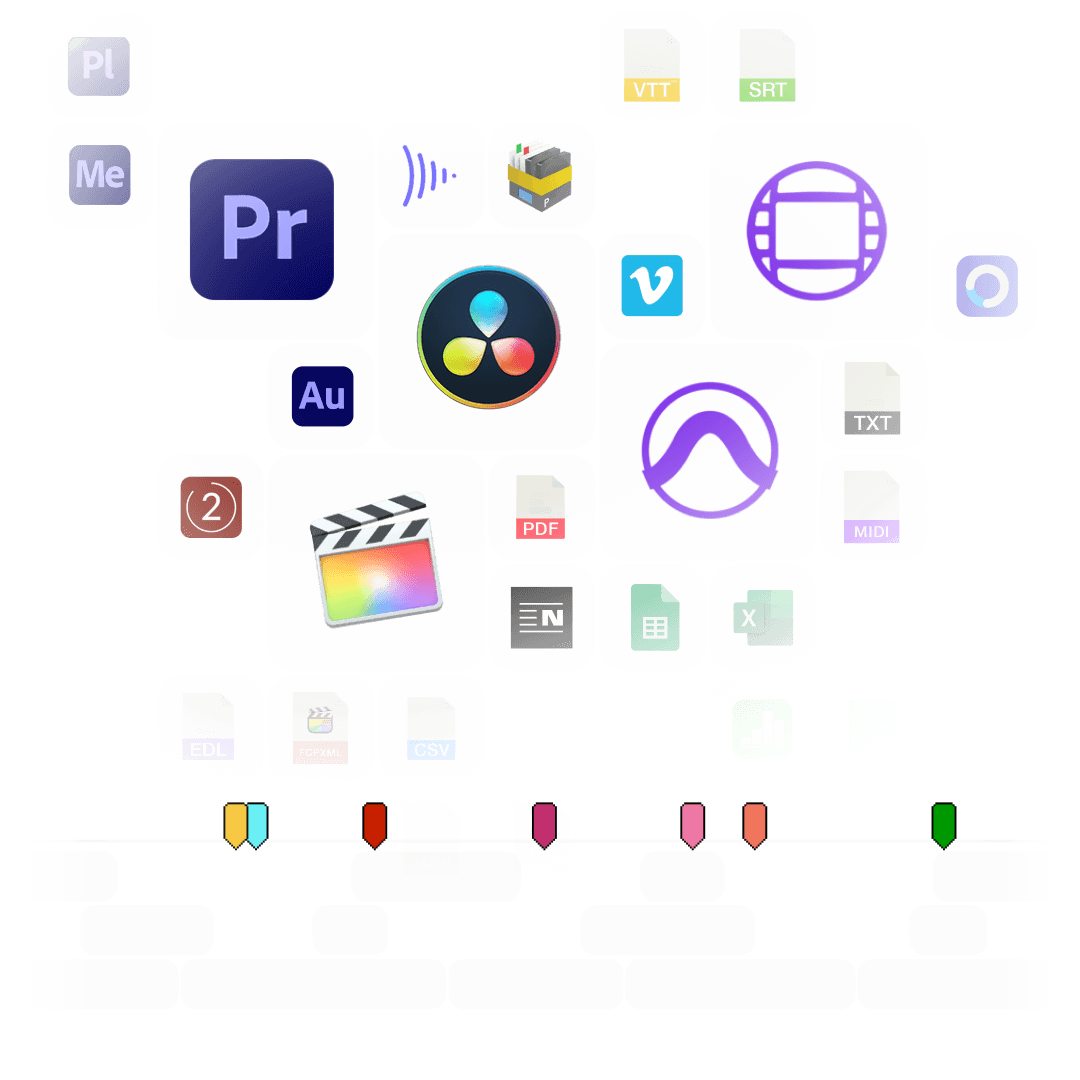
The following applications and file formats are supported among others. See our instructions for each format below.
| Editing Software | Adobe Premiere Pro, Adobe Audition, Apple Final Cut Pro, Avid Media Composer, Avid Pro Tools, DaVinci Resolve |
| Review Tools | Frame.io, Vimeo Review, Dropbox Replay, Pix Systems, NoteTracks Pro, Krock.io |
| Subtitles | SRT, VTT, SBV, (more in our Subtitle Tool) |
| Docs & Sheets | PDF, CSV, Text, Excel, Google Sheets, Apple Numbers, OpenDocument Spreadsheet, TSV |
| Other Tools | oTranscribe, Adobe Prelude Live Logger, NanoLokit Logs |
Go to "File -> Import" and select the xml file.
Select the sequence in your project tab.
In menu, go to: "File -> Export -> Final Cut Pro XML"
Select "Final Cut Pro XML" and hit ok.
You can use Adobe Prelude Live Logger app to create live timecode notes and tags which you can export and convert in this tool into other marker formats.
Go to: "Tools -> Marker"
Right Click: Import Markers
Select the generated "xml" or "txt" file from EditingTools.io.
Go to: "Tools -> Marker"
Right Click: "Export Markers as XML" OR "Export Markers as Text"
Select "Change marker duration" from the "more options" menu.
Yes, you can overwrite the marker name within the marker description field in Media Composer. Simply use "|" to separate the name and the description. When you import the markers to EditingTools.io, it will be split into name and description.
Avid Media Composer might fail importing markers if they overlap.
There are 3 different ways to bring markers into Avid Pro Tools. The most suitable of these 3 is the Pro Tools PTX format.
| PTX Session Data | MIDI File | EDL File | |
|---|---|---|---|
| Marker colors | Yes | No | No real markers but clips with the marker name as clip name. |
| Individual Session Timecode Start | Yes | Yes | Not relevant |
| Adjustable audio pull rate | Yes | No | Not relevant |
| Adjustable sample rate | Yes | No | Not relevant |
| Import new markers at a later time | Yes | No. Pro Tools allows only one Midi track with markers per session. | Yes |
In ProTools, go to "File > Import > Session Data". Select and open the generated ".ptx" file. In the "Import Session Data" window, make sure the "Ruler Markers / Memory Locators" box in the lower "Session Data" panel is checked. Press "OK" and your markers will be imported.
The PTX converter was developed in partnership with Sounds in Sync. Therefore, we are currently unable to offer the converter for free.
We are currently unable to offer a flat rate for PTX conversions. If you need unlimited conversion, you can have a look at EdiMarker from Sounds in Sync.
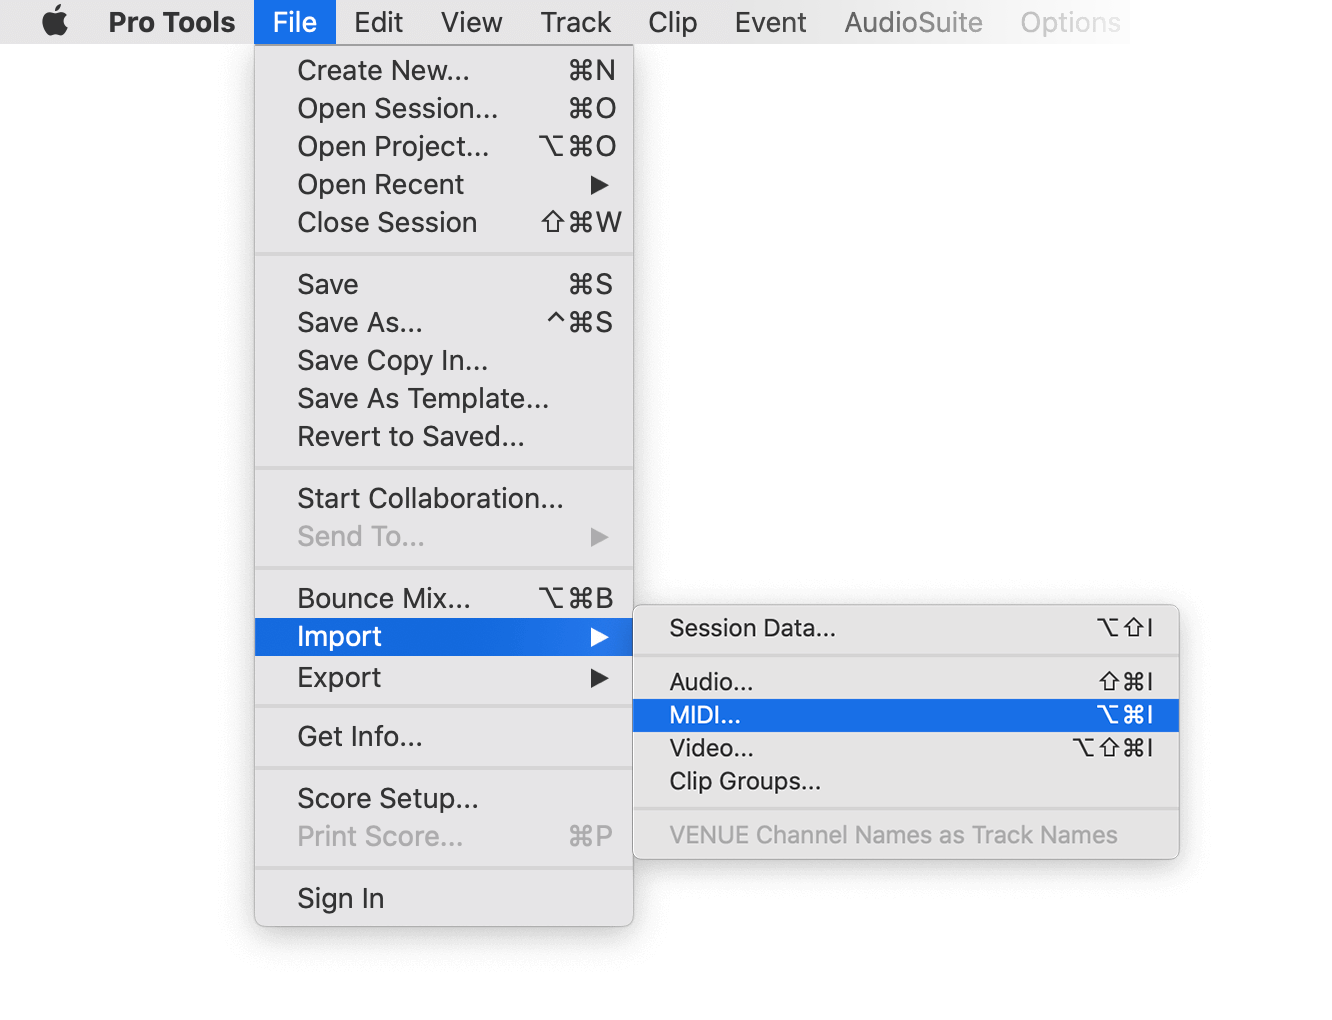
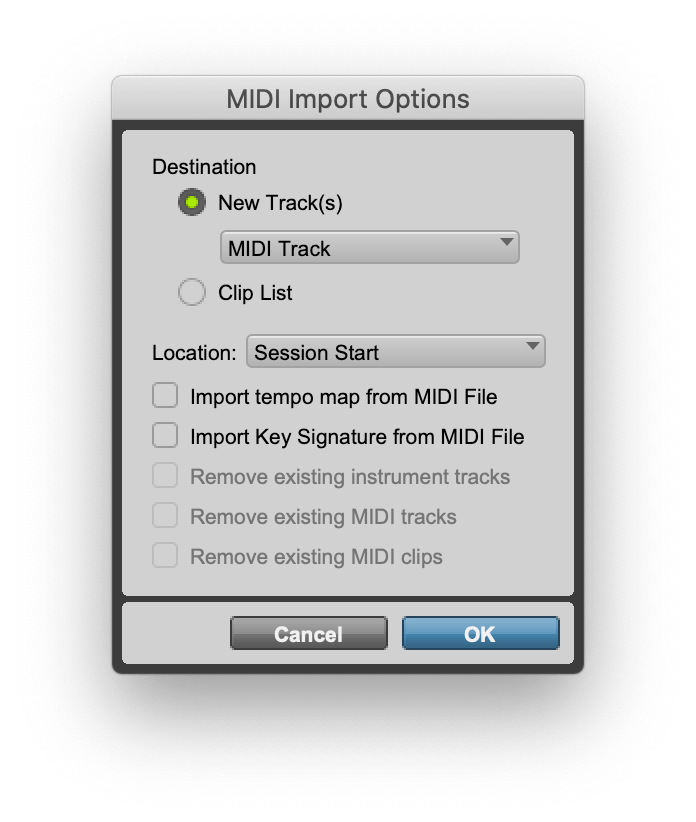
Under "File -> Import -> Midi" you can import the generated marker file into Pro Tools. Select the file and then "Add Midi Track". Attention, if there is already a midi track with markers you have to remove them first. If your session is not at 00:00:00:00 the imported markers have an offset.
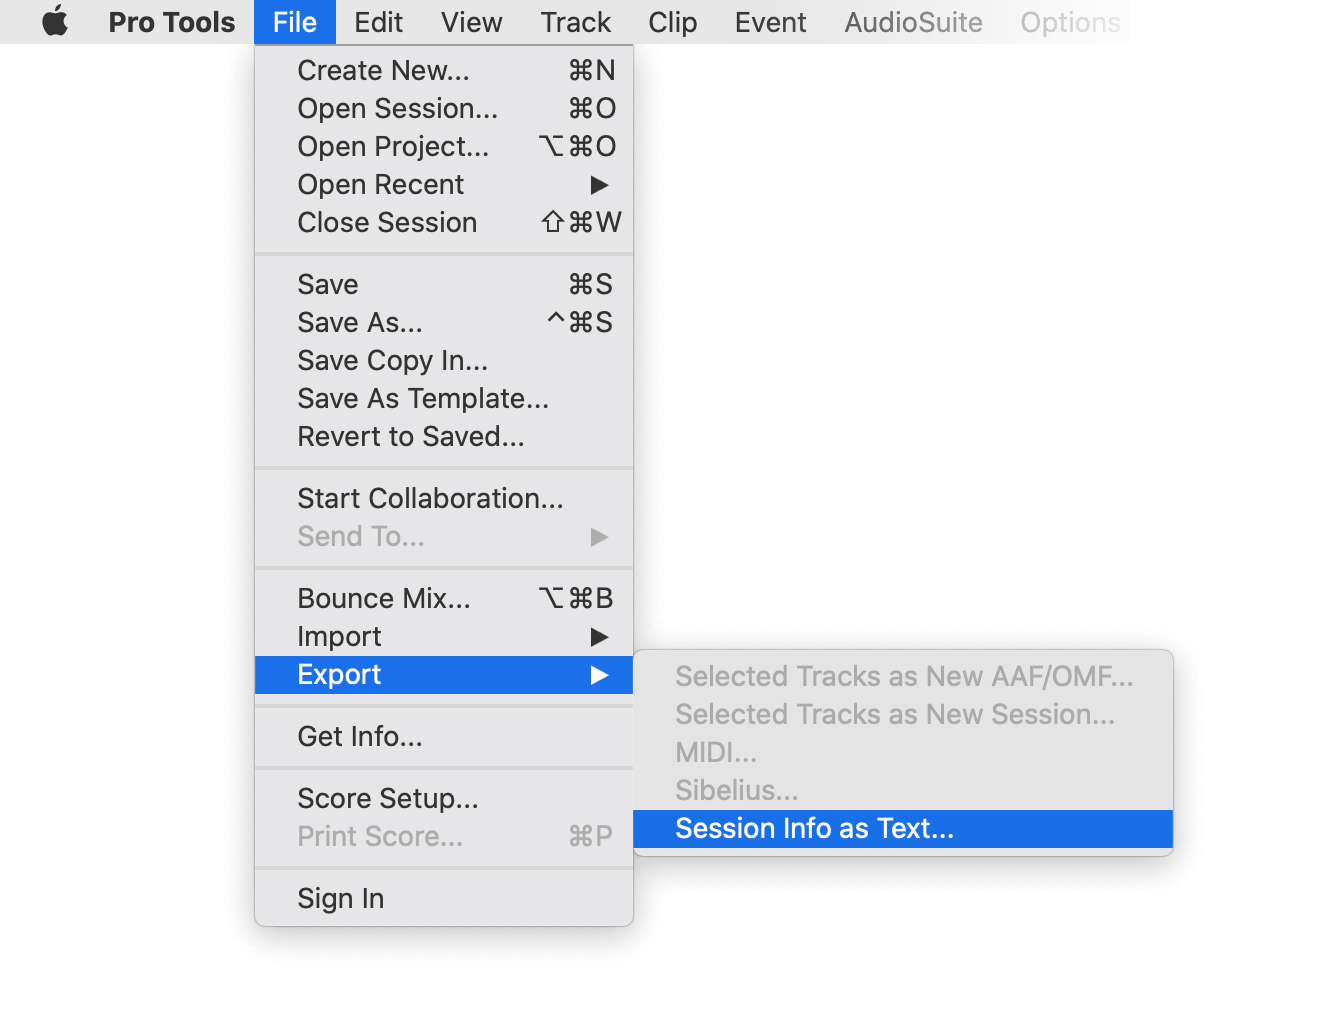
Under "File -> Export -> Session Info as text" you can export the markers from Pro Tools.
1. Create a new timeline or open a timeline in your project
2. Right-click the sequence timeline in your media tab.
3. Navigate to: Timelines > Import > Timeline Markers from EDL
4. Select the edl marker file for Resolve.
1. Select the sequence in your media tab.
2. Right-click the sequence timeline.
3. Navigate to: "Timeline > Export > Timeline Markers to EDL (.edl)"
Navigate to: "Timeline > Export > Edit Index (.csv)"
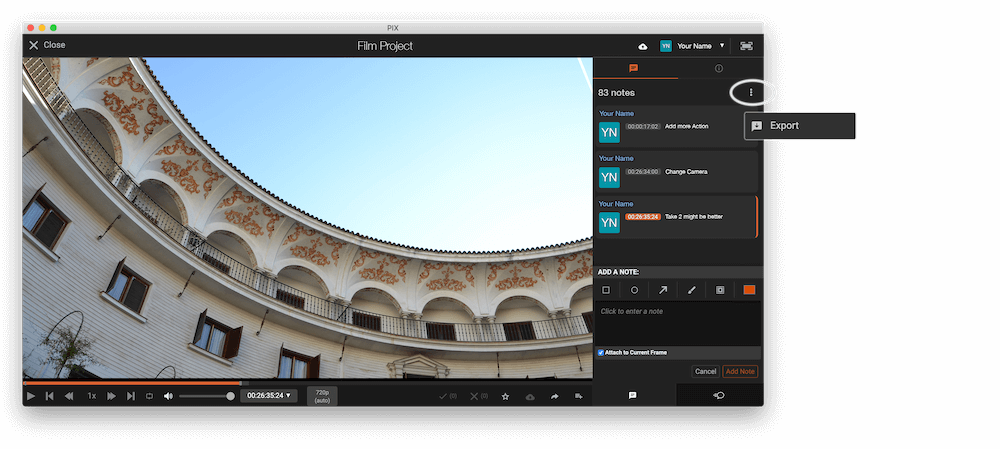
Open the comments panel on the right side in Pix. Press the three dots and select "Export". You can then download a CSV file from Pix that you can import into EditingTools.io.
Export markers from frame.io in marker menu "Download as File" > "CSV".
Export review notes from your project on vimeo.com as "CSV". Select "Vimeo Review" in the tool as "from" value.
You can use this tool to convert markers to YouTube Chapter Markers for the video description. Select "Convert to" to "YouTube Chapter Markers (.txt)". Open the generated .txt file and paste its contents into your video description.
To export markers and comments from NOTETRACKS Pro, click the Download button in your active session and select "NoteTracks.com > Audition Markers (.csv)". In our Marker Tool, select Convert from "NoteTracks.com > Audition Markers (.csv)".
NOTETRACKS Pro is an online review platform for audio creators. Learn more at notetracks.com.
To export comments from Krock.io, select a video and open the menu via the three dot icon. Select "Export comments to csv" to export the comments. In the marker converter select "Krock.io" as "convert from" value.
Krock.io is an online media content review tool. Learn more at Krock.io.
Convert comments from E-Mail, Word, Pages, Slack, Chats or any other clean Text Source into markers using the Textfield option. Simply copy and paste the comments into the textfield.
0:32 Please add Music
1min Intro
1:55min Add Cut
17.6min VFX Shot?
21:12 Add Detail Shot
23.1 VFX
75:20 Credits?
1:32, 01:32, 00:01:32, 1.32, 01.32, 1:32min → TC 00:01:32:0075:20, 75:20min, 75.2 → TC 01:15:20:00
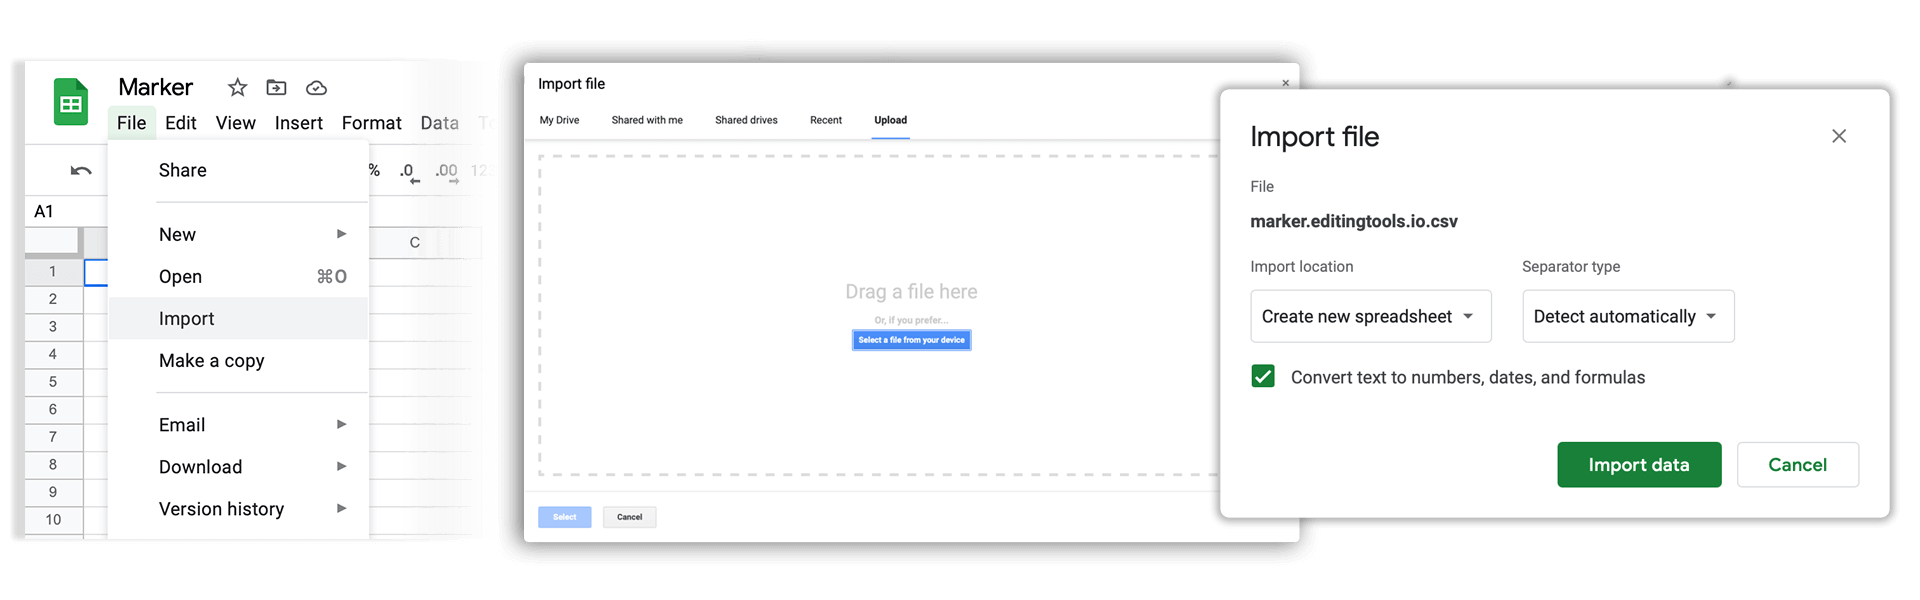
Open Google Sheets and go to "File -> Import". Upload the generated CSV file and press "Import Data".
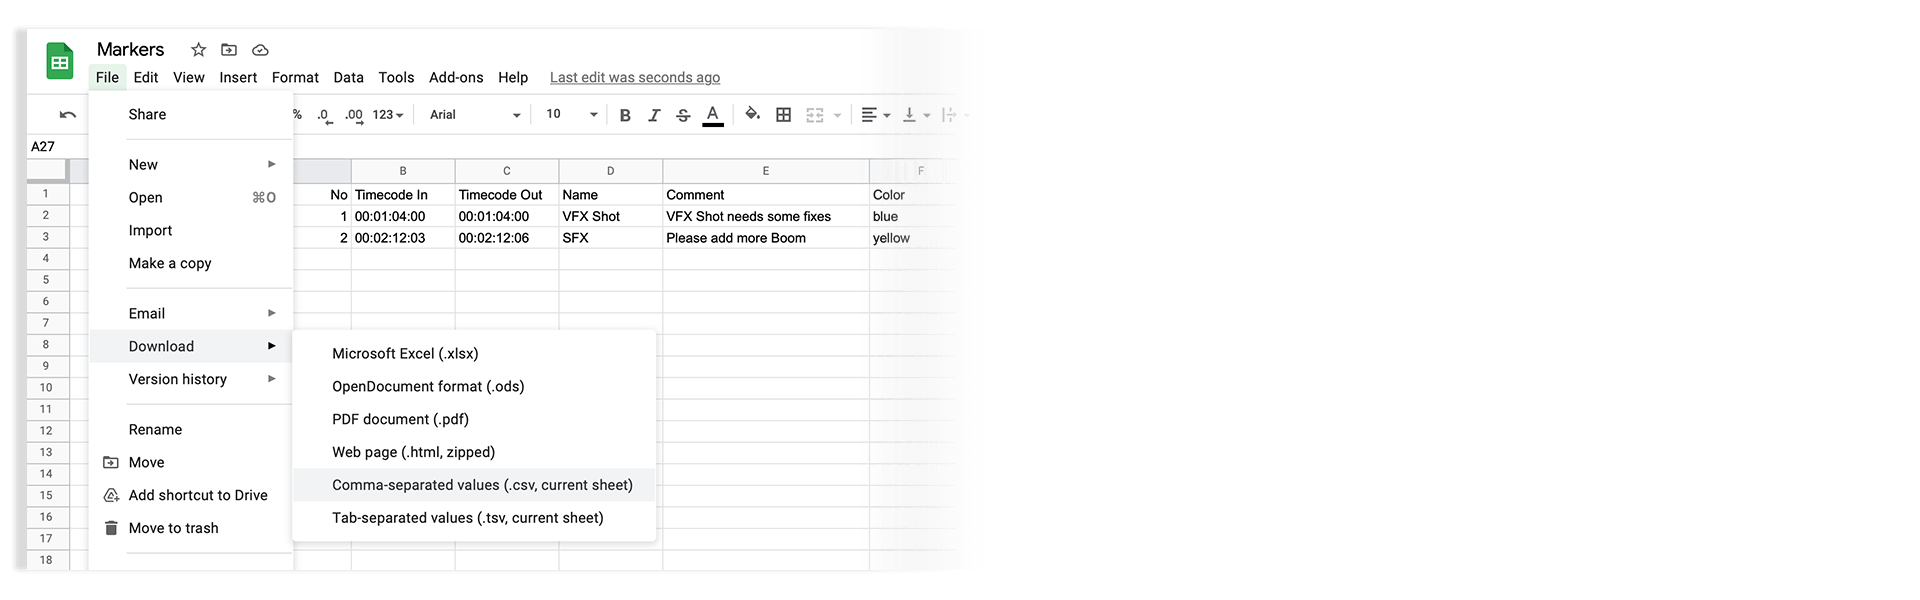
Go to "File -> Download -> Comma-separated values". Download the CSV demo file here: demo_marker_file.csv.
Markers can be exported as XLSX or XLS files for Microsoft Excel.
Markers can be exported as ODS (OpenDocument Spreadsheet) file for Open Office Calc.
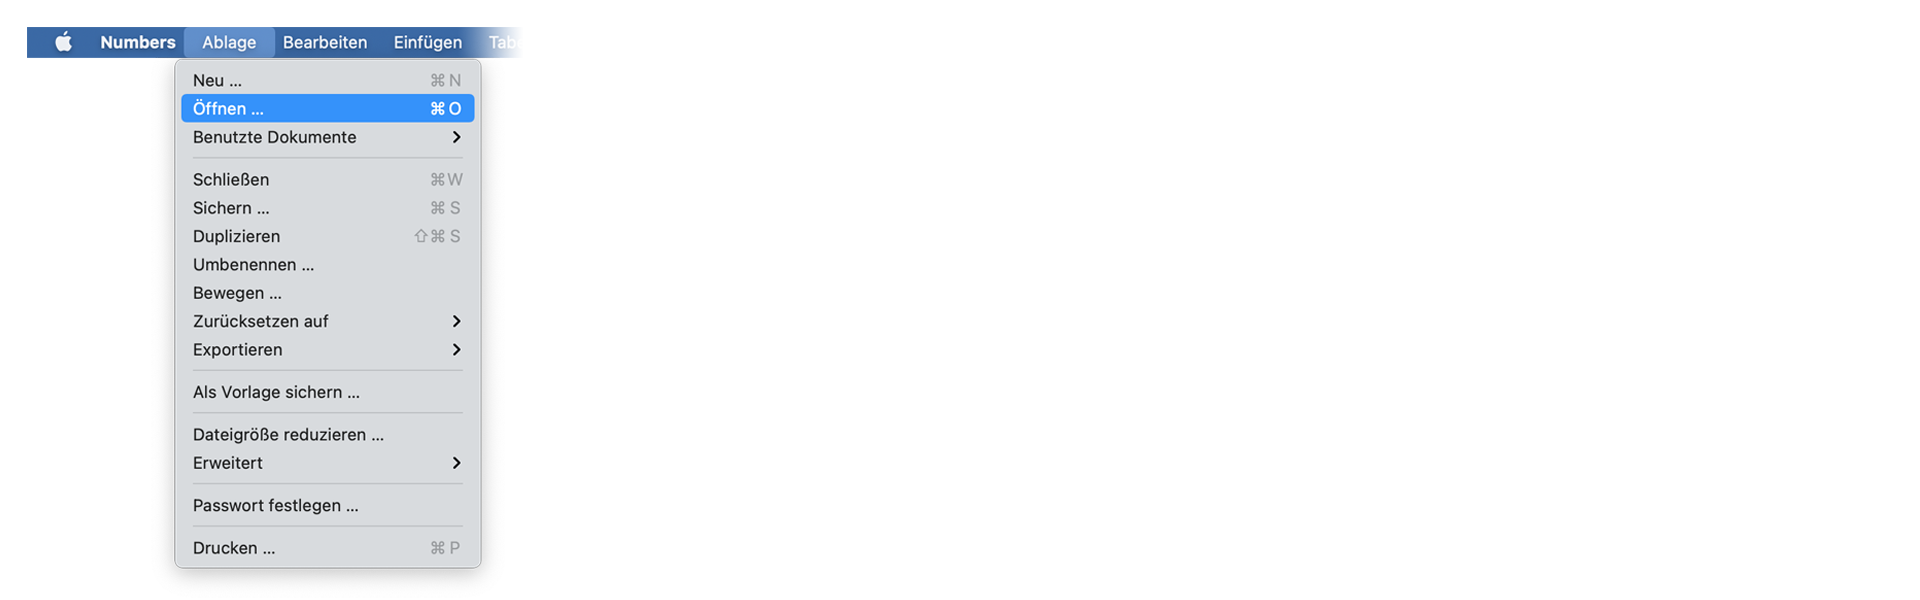
Open Numbers and go to "File -> Open". Simply open the CSV file.
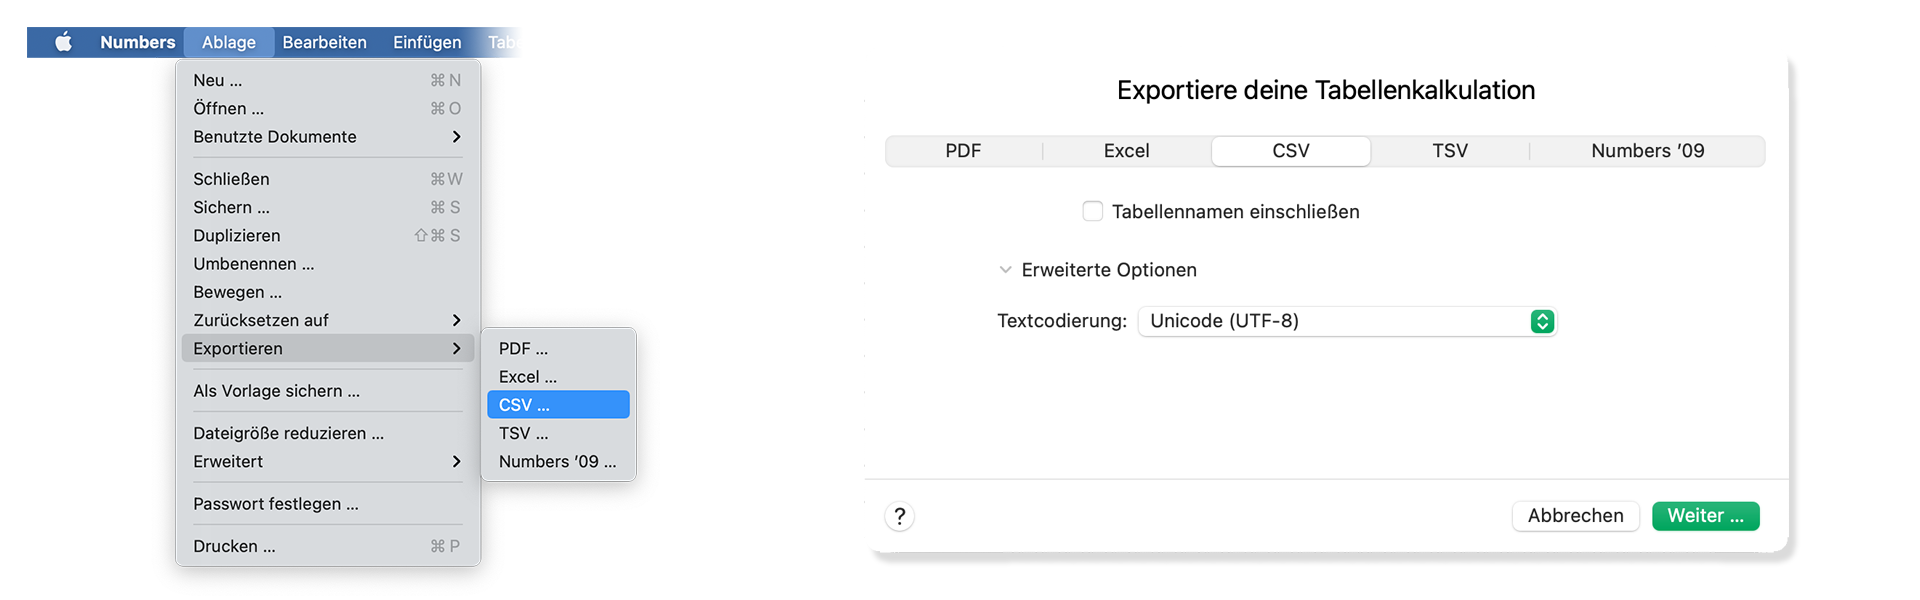
Go to "File -> Export -> CSV". Download the CSV demo file here: demo_marker_file.csv.
Yes. Just take a look at our demo files to match the rules for correct interpretation. The marker converter accepts comma-, semicolon- and tab-separated files.
Download the CSV demo file here: demo_marker_file.csv.
Marker CSV Preset in Google Sheets: Open in Google Drive.
Only "Timecode In" is necessary. All other headers are optional. Accepted colors: blue, cyan, green, yellow, red, orange, magenta, purple, fuchsia, rose, sky, mint, lemon, sand, cocoa, white, black
Simply select your subtitle file.
Yes. Have a look at our Subtitle Tool & Converter.
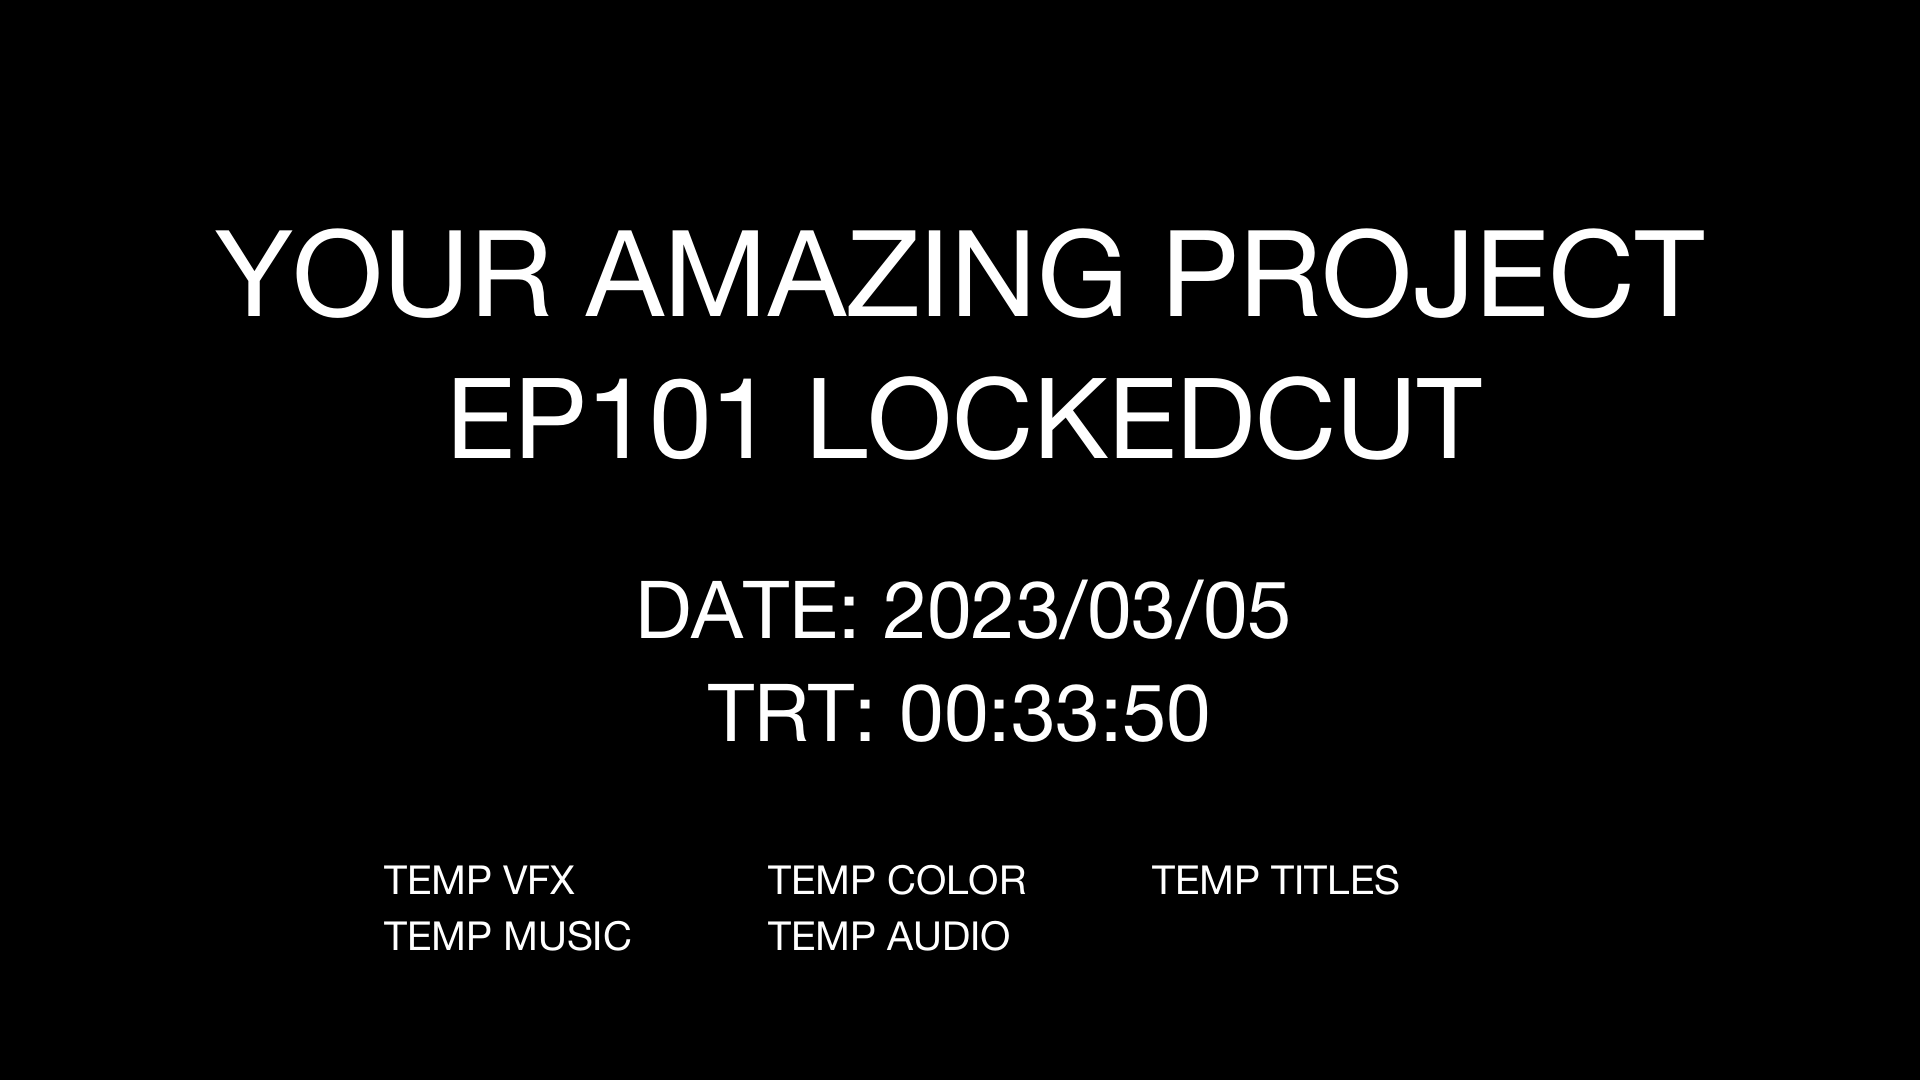
To export a PDF, select pdf as output format.
You can use otranscribe.com to generate your markers from any audio or video file.
To export the markers go to "Download Transcript as" and download your script as "oTranscribe format (.otr)".
Ambient's NanoLockit is a great way to log takes on set. The log files (.markers) can be converted to any other format using this marker converter.
Learn more about the NanoLockit on ambient.de/collections/nanolockit
You can export comments from Dropbox Replay in JSON format to convert them with our tool.
Our free marker tool offers a huge amount of features to convert and modify files. However, there are some limitations on the free tier that require a PRO subscription to unlock.
Explore Pro Features| Feature | Free | Pro |
|---|---|---|
| Conversion limit | Fair Use | No limit |
| Entries per file | up to 1200 | No limit |
| Premium formats | ✕ | ✓ |
| File encryption | ✕ | ✓ |
We have a light version of our Marker Converter available as an offline app for macOS and iOS. It is aimed at users on air-gapped systems and enterprise customers.
The supported formats and features in the standalone app are outlined in the app description. Not all features from the online app are available in the offline app.
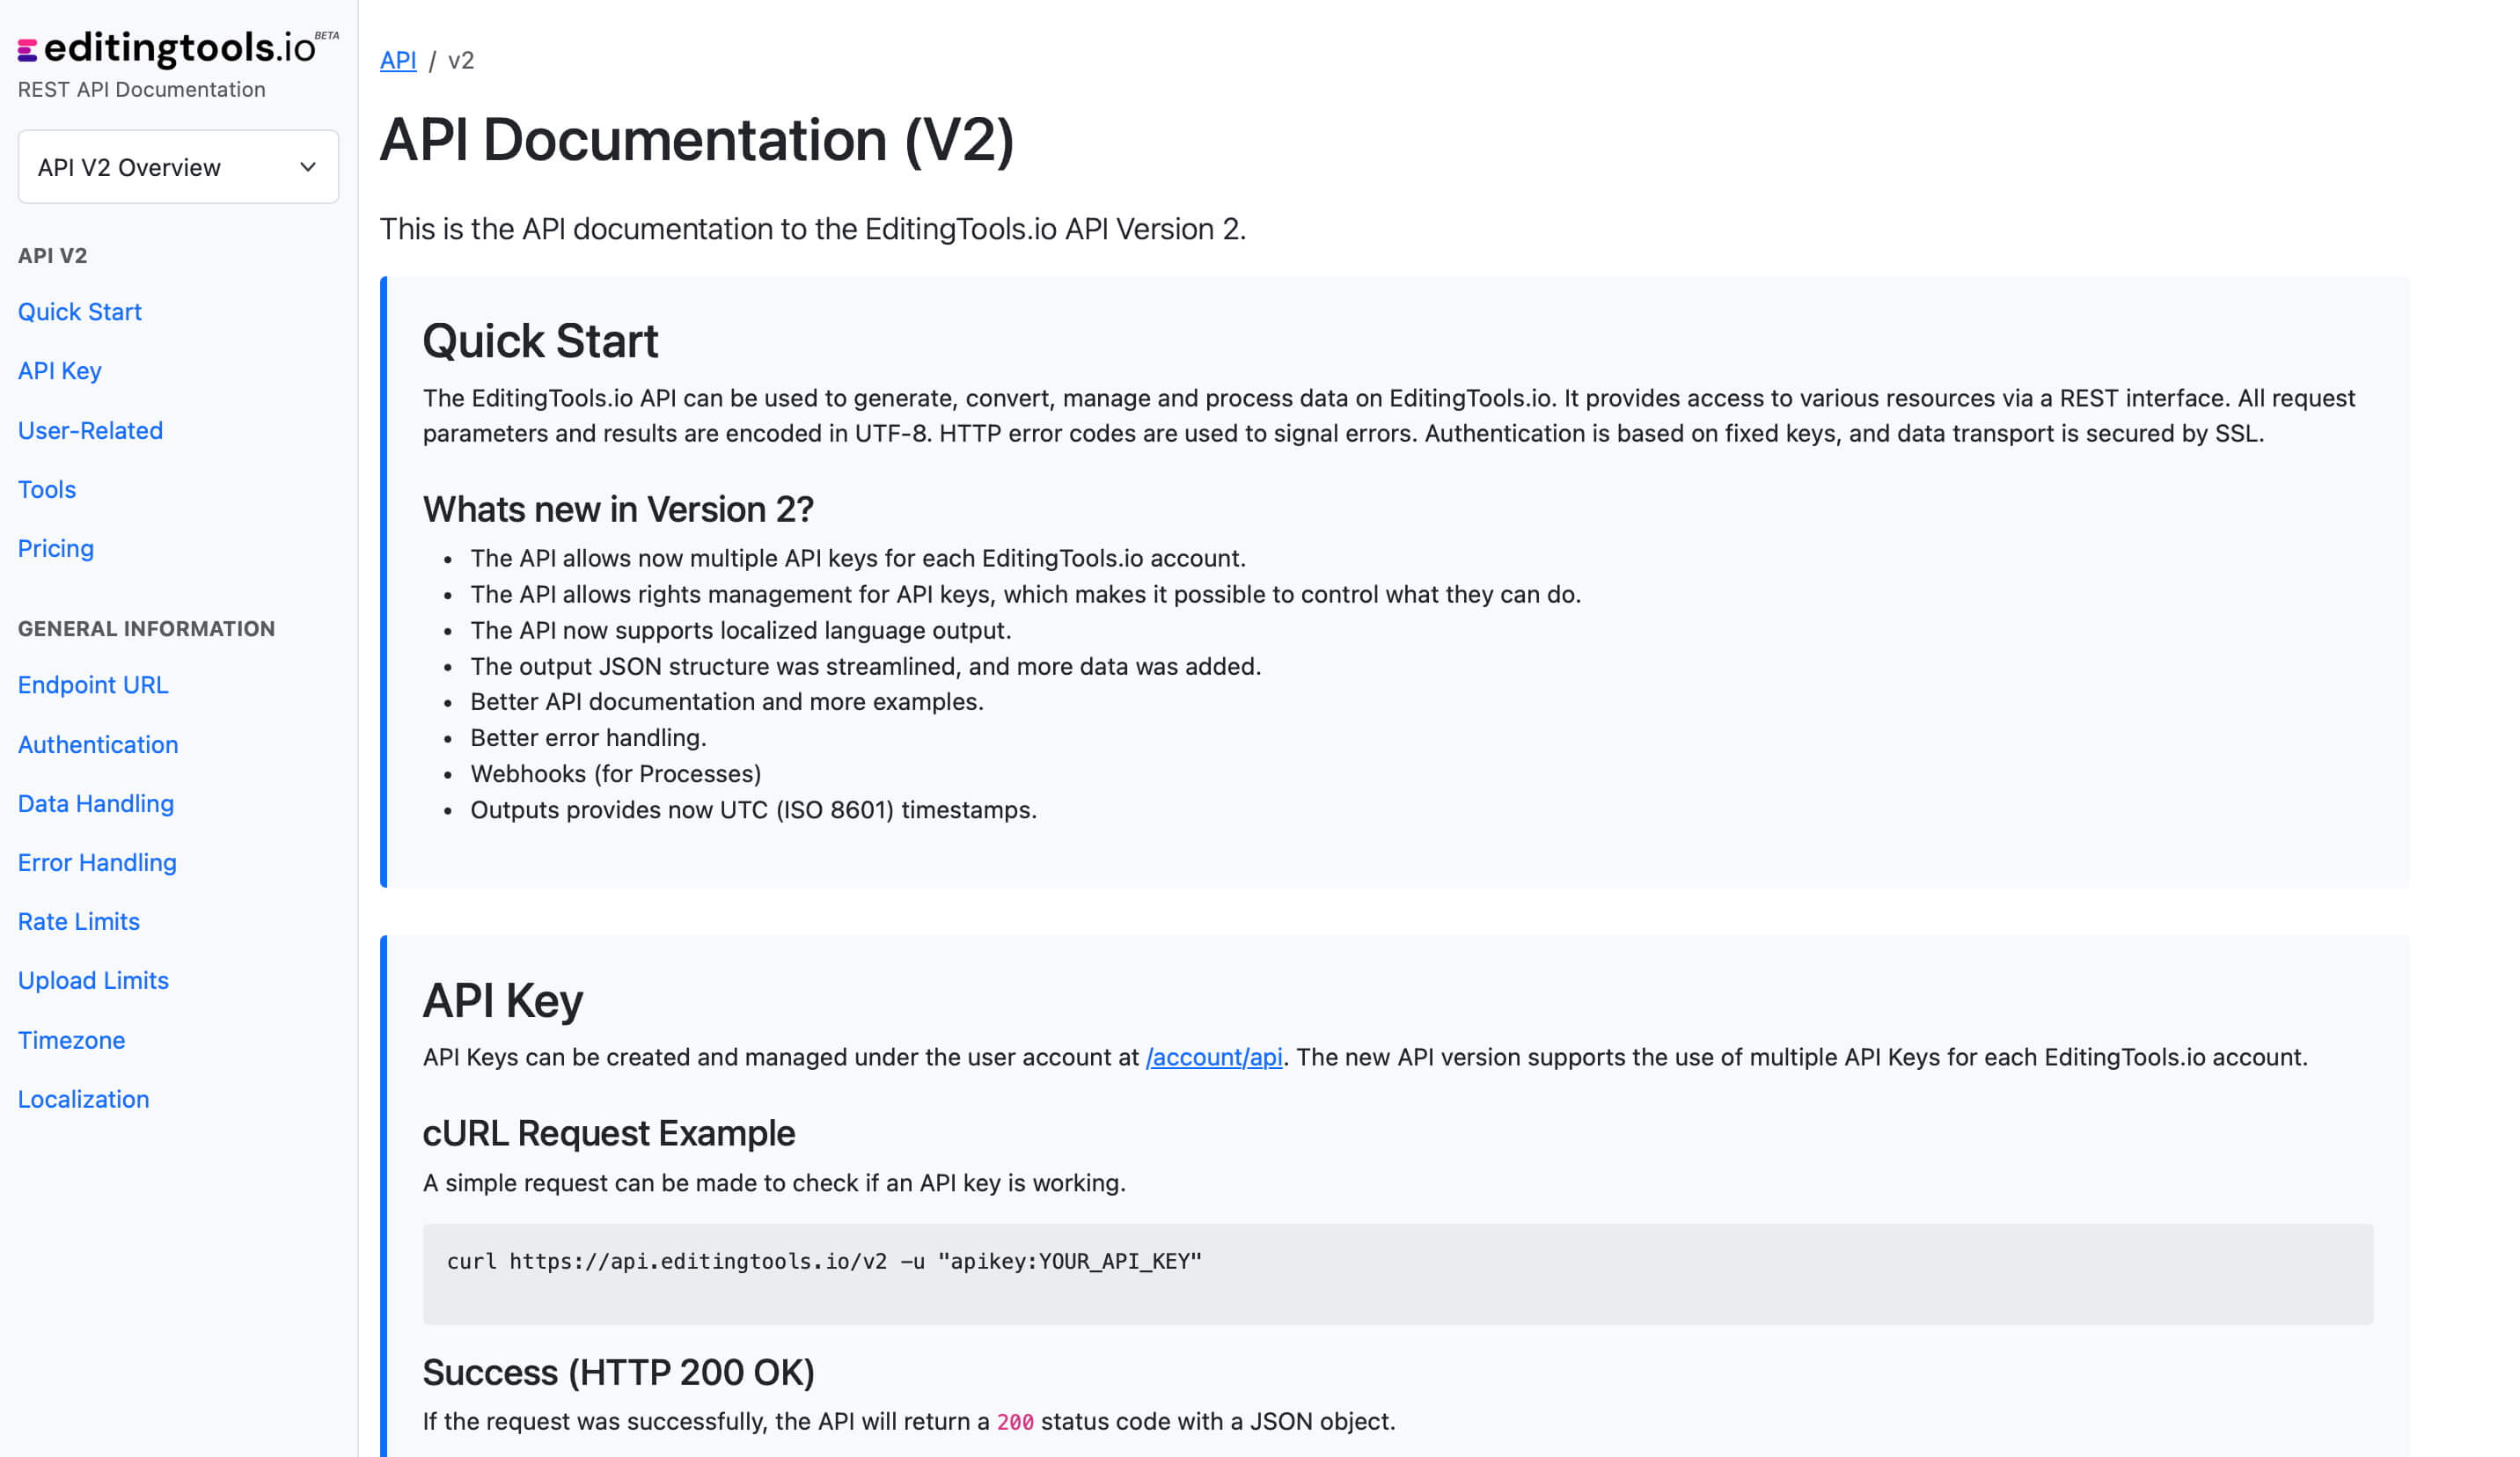
Независимо дали сте разработчик или просто искате да автоматизирате повече процеси с инструменти като Zapier или Make, можете лесно да интегрирате този инструмент в работните си процеси с нашия API. Научете повече за интегрирането на REST API в нашата документация за API.
Документация на API